Online Store 2.0 Theme Setup Guide
After installing the app in your Shopify store, follow these steps to display the Gift Calendar for your visitors.
✅ Step 1: Add gifts to the calendar
- Click on a date in the calendar.
- Enter the gift description in the editor.
- (Optional) Attach an image.
- Save the gift.
✅ Step 2: Display the Gift Calendar in your store
Once you’ve added all the gifts, you’re ready to display the calendar in your store.
You can add the Gift Calendar to one of your pages through the app. To do that select one of your existing pages in the dropdown then click "Add to selected page". You will be redirected to the theme editor to the selected page and the Gift Calendar section will be added to the Apps section of the page.
If you want to add it to a new page, select the "+ Add new page" option in the dropdown and click on "Add to new page". Once the app created the new page, click on "Add Gift Calendar to the new page" button to be redirected to the theme editor. The Gift Calendar section will be added to the Apps section of the page.
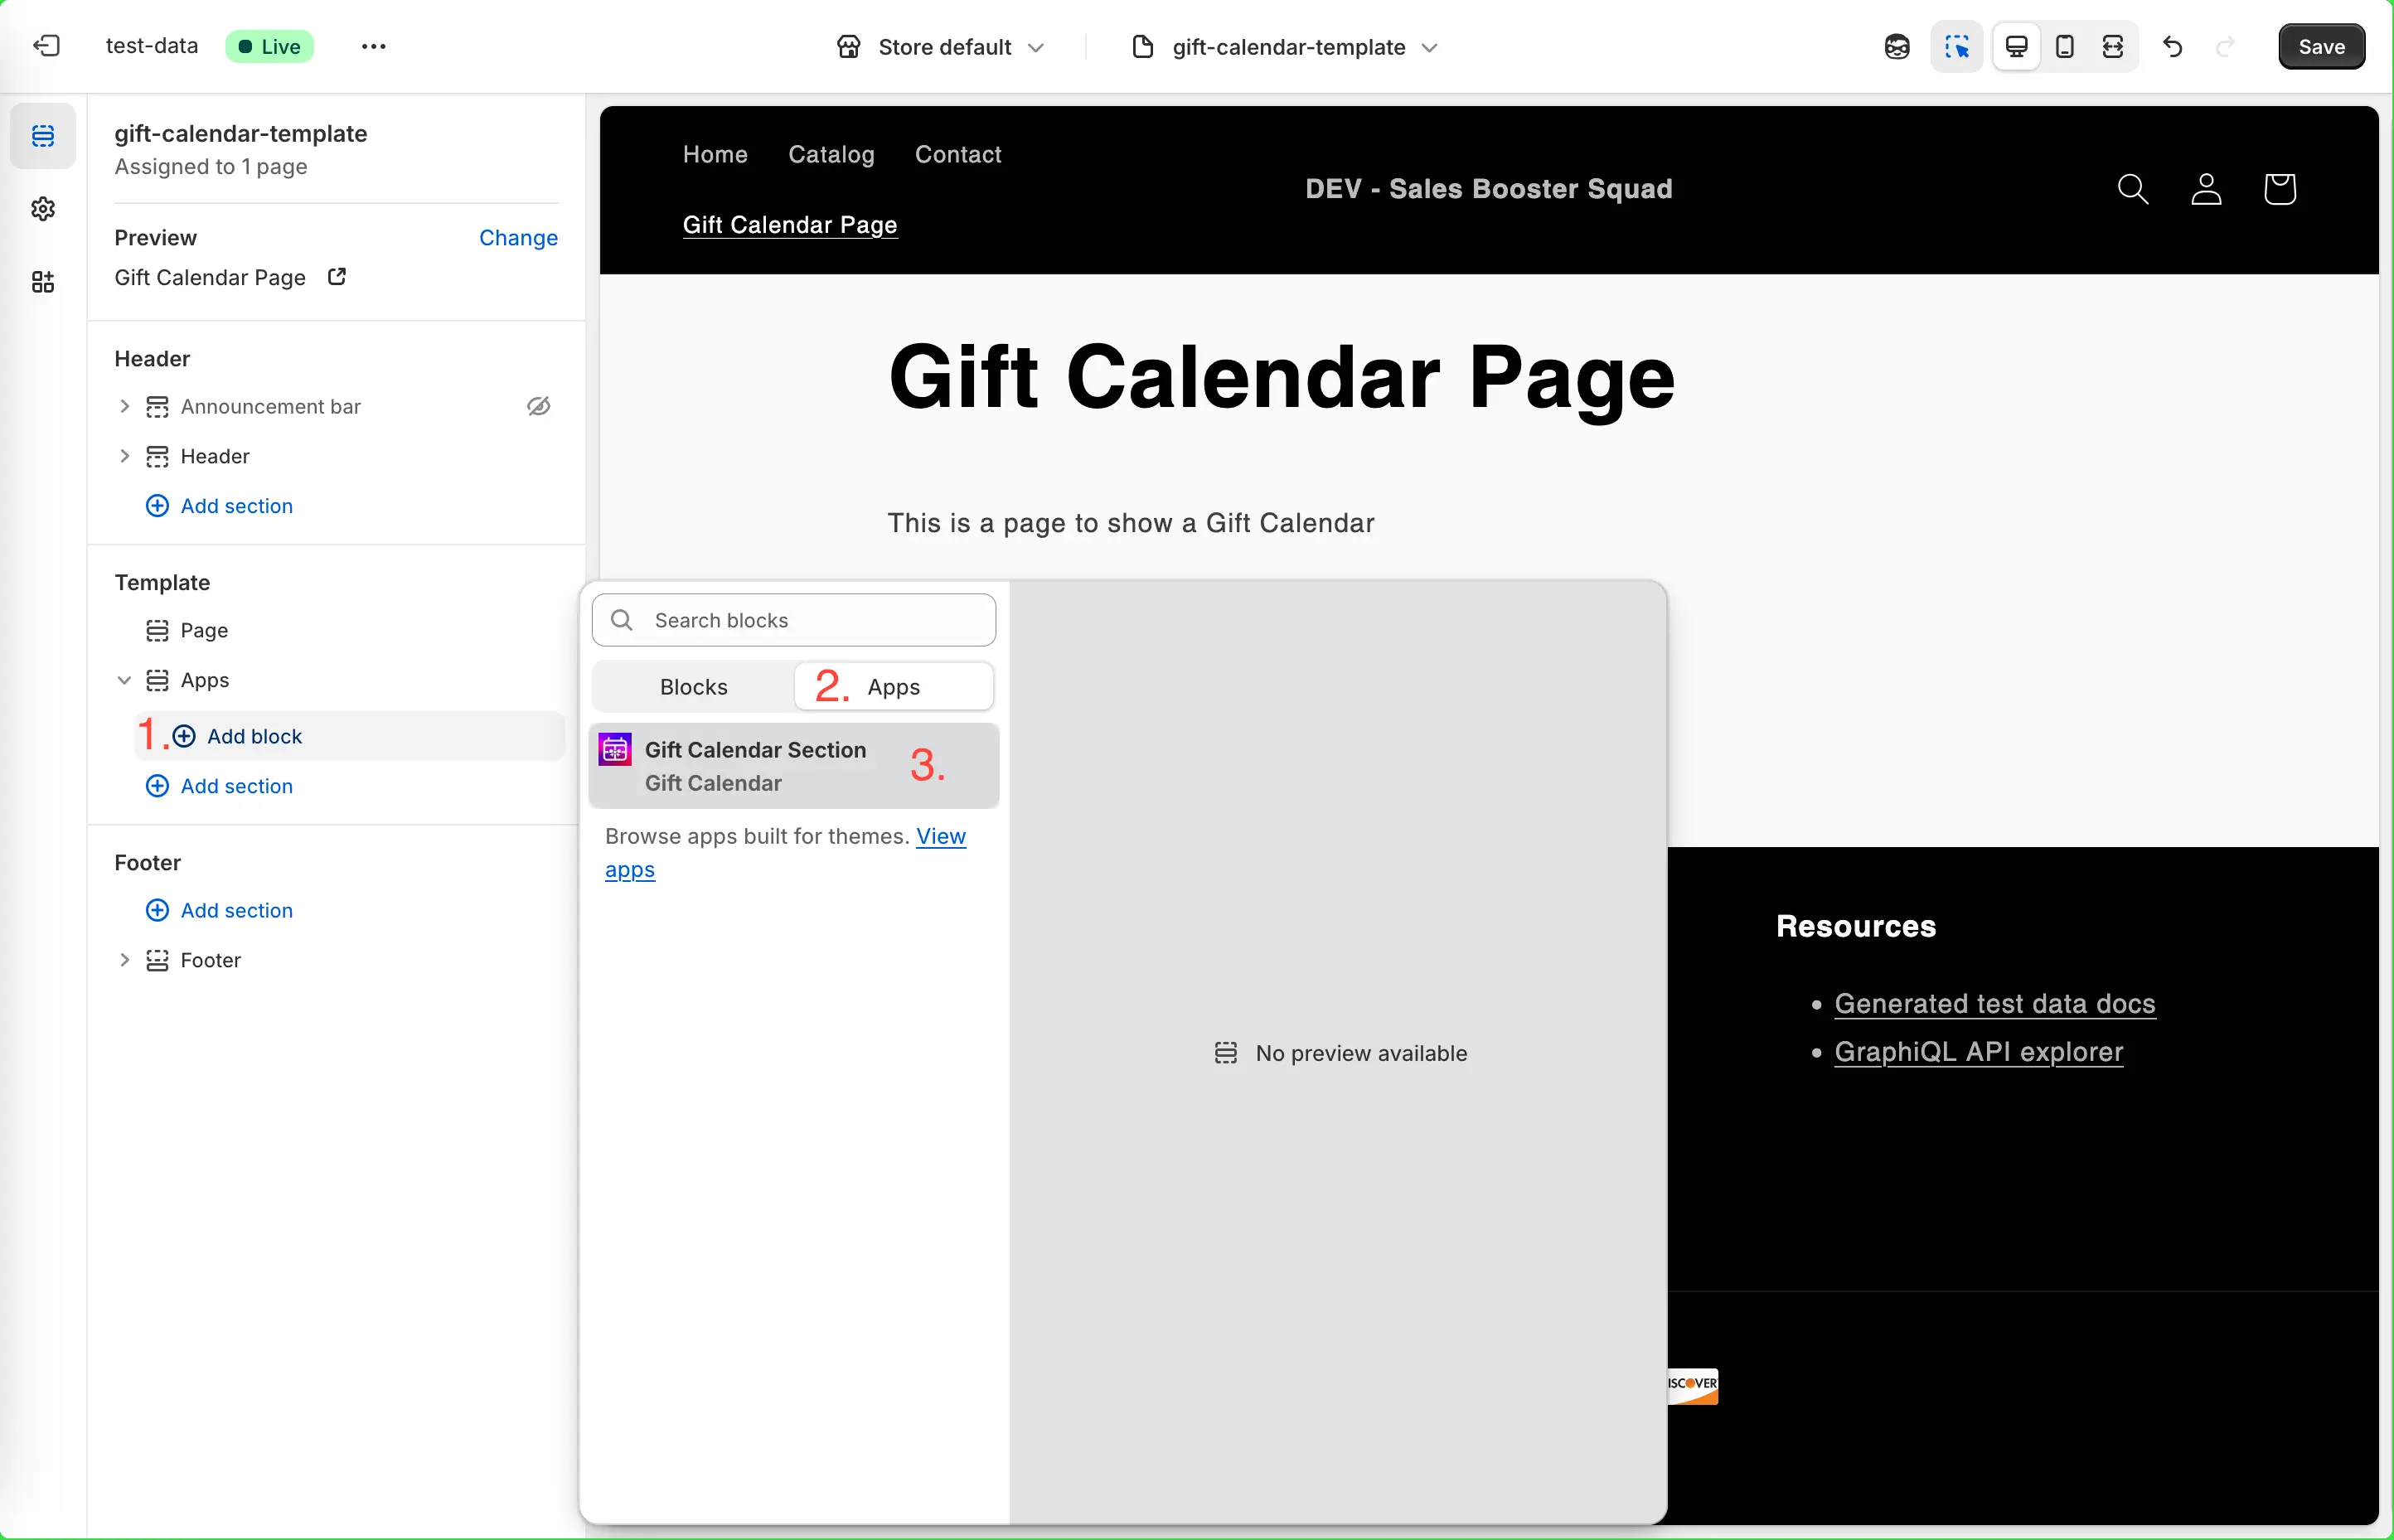
Or you can add the Gift Calendar section to your page / section / collection manually:
- Open the Theme Editor.
- Select the page or template where you want to add the calendar.
- In the App section (or by adding a new section), select the Gift Calendar block.
- The calendar (with your added gifts) will appear and be ready for customization.
🎨 Step 3: Customize the Gift Calendar
To customize the calendar in an Online Store 2.0 theme:
- Select the Gift Calendar section you added earlier.
- Click the section to open the settings panel.
- Adjust the design settings to match your brand.
- Save your changes.

Your Gift Calendar is ready to go!
That’s it! Your Gift Calendar is live and ready to share with your customers.
To get the best results, check out our best practices.
💬 Need Help?
If you’re unsure how to structure your campaigns or run into any issues, contact us at hello@salesboostersquad.com. We’ll be happy to help you optimize your Gift Calendar strategy.